Gold Metal Detectors
In Alaska, a metal detector will make any gold prospecting trip more productive. They are simple to operate, easy to carry, and can be used in many other adventures, not just your gold prospecting trip to Alaska. They are widely available and can be purchased in Alaska when you arrive. Just remember that many areas produce fine gold and small flakes, but these areas will not usually prove productive with a metal detector. Just the areas with larger gold nuggets will be of interest, and so many locations that are fine for panning and other types of mining will not be worth your time if you plan on going for the big nugget. The most important thing to remember is to have fun while you are using your metal detector in Alaska
How Metal Detectors Work
Metal detectors use electromagnetic induction to detect metal. Uses include demining (the detection of landmines), the detection of weapons such as knives and guns, especially at airports, geophysical prospecting, archeology and ‘treasure hunting’. Metal detectors are also used to detect foreign bodies in food, and in the construction industry to detect steel reinforcing bars in concrete and pipes and wires buried in walls and floors. In it’s simplest form, a metal detector consists of an oscillator producing an alternating current that passes through a coil producing an alternating magnetic field. If a piece of metal, which is electrically conductive, is close to the coil eddy currents will be induced in the metal, and this produces an alternating magnetic field of its own. If another coil is used to measure the magnetic field (acting as a magnetometer) the change in the magnetic field due to the metallic object can be detected. Metal detectors have been around for much longer than most people realize. Towards the end of the 19th century, many scientists and engineers used their growing knowledge of electrical theory in an attempt to devise a machine which would pinpoint metal. The use of such a device to find ore-bearing rocks would give a huge advantage to any miner who employed it. The German physicist Heinrich Wilhelm Dove invented the induction balance system, which was incorporated into metal detectors a hundred years later. Early machines were crude and used a lot of battery power, and only worked to a very limited degree. The Scottish physicist, Alexander Graham Bell, used such a device to attempt to locate a bullet lodged in the back of American President James Garfield in 1881. The modern development of the metal detector began in the 1930’s. Gerhard Fischer had developed a system of radio direction-finding, which was to be used for accurate navigation. The system worked extremely well, but Dr Fischer noticed that there were anomalies in areas where the terrain contained ore-bearing rocks. He reasoned that if a radio beam could be distorted by metal, then it should be possible to design a machine which would detect metal, using a search coil resonating at a radio frequency. In 1937, he applied for and was granted, the first patent for a metal detector. His designs were soon put to the test in a practical way, as they were used as mine detectors during the Second World War. They were heavy, ran on vacuum tubes, and needed separate battery packs – but they worked. After the war, there were plenty of surplus mine detectors on the market; they were bought up by relic hunters who used them for fun and for profit. The hobby of metal detecting had been born. Many manufacturers of these new devices brought their own ideas to the market. Whites Electronics of California began in the 50’s by building a machine called the Oremaster Geiger Counter, and are still at the leading edge of detector innovation today. Another leader in detector technology was Charles Garrett, who pioneered the BFO (Beat Frequency Oscillator) machine, and whose company is still one of the world leaders in design. With the invention and development of the transistor in the 50’s and 60’s, metal detector manufacturers and designers made smaller lighter machines with improved circuitry, running on small battery packs. The metal detector was reduced to a size that even a child could use – and use them they did. Fabulous finds were made; prehistoric gold ornaments, chests of Roman coins, jeweled daggers, arrowheads- all types of metal artifacts were coming out of the ground. Suddenly, there was a huge requirement for those early electronic magic wands which might make a man rich overnight. Companies sprang up all over the USA and Britain who wished to supply the growing demand. Larger portable metal detectors are used by archaeologists and treasure hunters to locate metallic items, such as jewelry, coins, bullets, and other various artifacts buried shallowly underground. Technological changes were taking place at a rapid rate too, and very few of the smaller companies managed to stay in competition with the big outfits. GOLDAK, METROTECH, IGWT, TEC, and, quite recently, ARADO ceased production of hobby machines. Some devotees of metal detecting still treasure their Arado machines, which had a reputation for being difficult to set up, but were reputed to be the deepest-seeking hobby detectors ever made. The biggest technical change in detectors was the development of the induction-balance system, where two coils are set up in an electrical equilibrium to produce a ‘null’ or zero balance. Introducing metal to the vicinity of the coils caused them to unbalance, producing a change of tone in the machine’s speaker. Scientists had long known that every metal has a specific response to stimulation by alternating current. Each metal produces a time lag or ‘phase angle’ in its induced current, in relation to the drive current. This meant that detectors could now be set up to ignore unwanted phase angles, and respond positively only to desired metals. But there was also a downside to the development of the ‘discriminator’ detectors. Introducing discrimination always had the effect of reducing the sensitivity of the machine, so it was less able to find deep objects. In addition, there was the fact that some desirable metals were quite near the area of unwanted metals, such as iron. Gold, particularly in alloy form, was quite close to tinfoil in the overall spectrum, so the discrimination control had to be used carefully. The price to be paid for setting up a detector to ignore iron and tinfoil was the certainty that, sooner or later, the user would scan over, and ignore, a valuable find – perhaps a diamond engagement ring on a beach. Coil designers also tried out innovative designs. The original Induction Balance coil system consisted of two identical coils placed on top of one another. Compass Electronics produced a new design; the two coils were made in a D shape, and were mounted back-to-back to form a circle. This system was widely used in the 70’s, and both concentric and D type (or Widescan as they became known) had their fans. Another development was the invention of detectors which could cancel out the effect of mineralization in the ground. This gave greater depth, but was a non-discriminate mode. It worked best at lower frequencies than those used before, and frequencies of 3 to 20 KHZ were found to produce the best results. Many detectors in the 70’s had a switch which enabled the user to switch between the discriminate mode and the non-discriminate mode. Later developments switched electronically between both modes. The development of the Induction Balance detector would ultimately result in the Motion detector, which constantly checked and balanced the background mineralization. At the same time, developers were looking at using a completely different type of technology in metal detectors. This was the process known as Pulse Induction. Unlike the Beat Frequency Oscillator or the Induction Balance machines which both used a uniform alternating current at a low radio frequency, the pulse induction machine simply fired a high-voltage pulse of signal into the ground. In the absence of metal, the ‘spike’ decayed at a uniform rate, and the time it took to fall to zero volts could be accurately measured. However, if metal was present when the machine fired, a small current would flow in the metal, and the time for the voltage to drop to zero would be increased. These time differences were minute, but the improvement in electronics made it possible to measure them accurately and identify the presence of metal at a reasonable distance. These new machines had one major advantage: they were completely impervious to the effects of mineralization, and rings and other jewelry could now be located even under highly-mineralized ‘black sand’. They had one major disadvantage too: there was no way to incorporate discrimination into a Pulse induction detector. At least, that was the perceived wisdom of scientists and engineers until Eric Foster, who had run Location Technology in Ireland for many years, started a new company in Britain and produced the Goldscan, the first Pulse Induction detector which had the apparent ability to differentiate between metals. This was a new type of ‘junk eliminator’ circuit, which relied on the size of the target as well as its metallic response to give a control that would show positive for a gold ring and negative for a copper coin. Its ability to differentiate between non-ferrous metals was not an exact science, but gave unparalleled depth on mineralized soil or sand. Pulse Induction detectors are now widely used in the construction industry; the Whites PI-150 is an industrial machine which can detect large objects to 10 feet, using a 12 or 15 inch coil. Metal detectors have come a long way, from the simple one-coil BFO, to today’s sophisticated machines. Modern top models are fully computerized, using microchip technology to allow the user to set sensitivity, discrimination, track speed, threshold volume, notch filters, etc, and hold these parameters in memory for future use. Compared to just a decade ago, detectors are lighter, deeper-seeking, use less battery power, and discriminate better. We can expect to see more improvements as designers continue to apply the latest Electronics and Computer technologies to the task of making ever better metal detectors. While these advances push technology to its full potential, new genres of metal detector have made their appearance. BB (Beat Balance) and CCO (Coil Coupled Operation) were unveiled by the electronics press in 2004. Both were invented by electronics writer and designer Thomas Scarborough, and combine unprecedented simplicity with good sensitivity.
Many people use consumer metal detectors to look for coins on the beach. Most metal detectors are only good to detect metal within a foot or so below the ground. The detection depth depends on the type of metal detector, type of metal in the buried object, size of the buried object, type of metals in the ground, and other objects in the ground.
There are four major types of hobbyist activities involving metal detectors:
* Coin shooting – looking for coins after an event involving many people, like a baseball game, or simply looking for any old coins
* Prospecting – looking for valuable metal like gold and silver
* Relic hunting – looking for items that are historically significant, like weapons used during a war
* Treasure hunting – looking for items that are rumored to be hidden
Before any user of a metal detector can confidently operate their machine, they need to know several vital steps that apply to most metal detector uses. The first step is “tuning” in your detector to the ground. This means that the detector is adjusted so that it recognizes the ground as a medium for targets to be in. Most new digital units have a “self-tuning” feature installed. For the ones that don’t, you must manually tune them in. After this is achieved, you’re ready to begin searching for your target, whether it’s a coin, gas line, or what have you. Placement of the loop above the ground is critical for desired performance. Hold the detector at arm’s length with the loop barely touching the ground. For most purposes, a “motion” mode is used. This means the loop must be moving at all times for it to function correctly. With the detector now ready to go begin to sweep it back and forth along the ground. Each sweep should take close to a second from one side to the other. Additionally, each sweep should overlap the last forming a tight sweep pattern. This way you will be less likely to pass over the target. While you are searching with your detector, a slow even pace should be established.
Gold Panning in Alaska
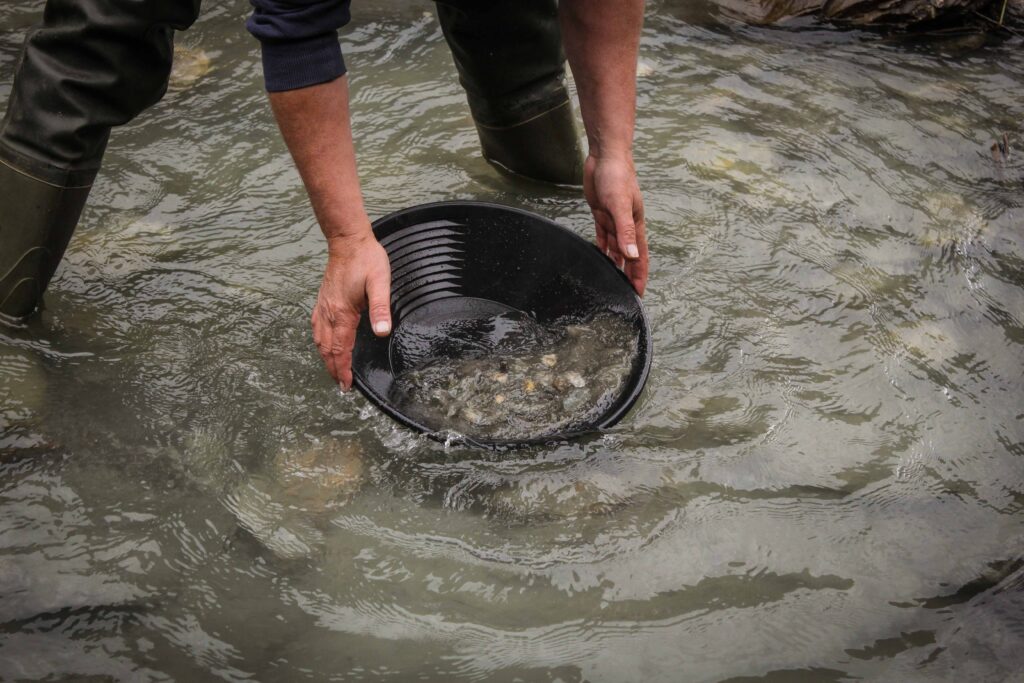
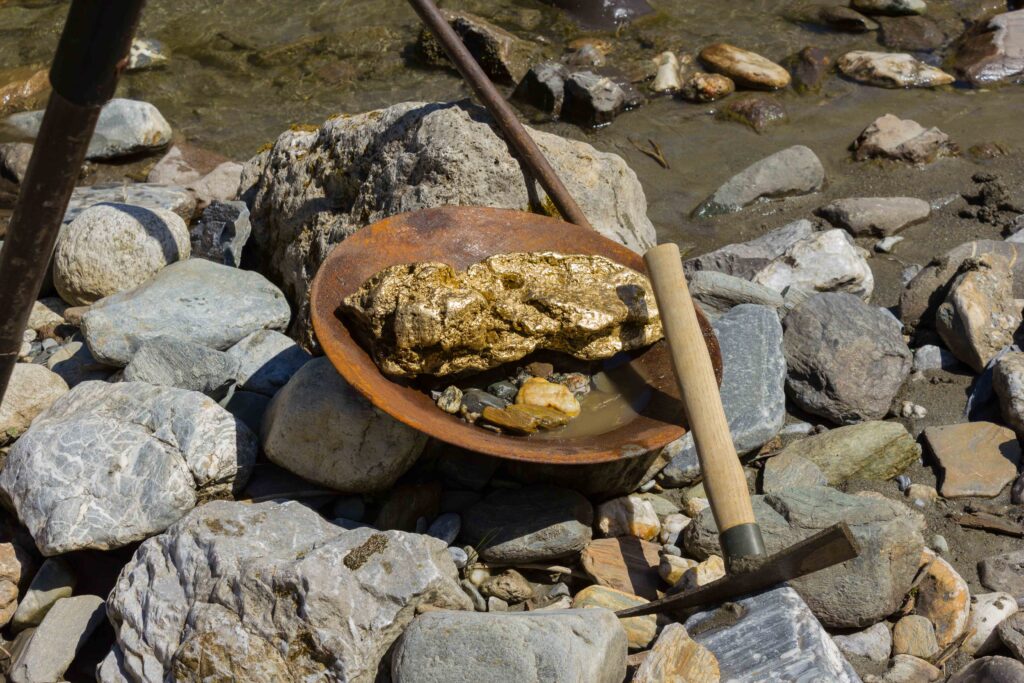
Anyone who pans for gold hopes to be rewarded by the glitter of colors in the fine material collected in the bottom of the pan. Although the exercise and outdoor activity experienced in prospecting are rewarding, there are few thrills comparable to finding gold. Even an assay report showing an appreciable content of gold in a sample obtained from a lode deposit is exciting. Regardless of whether you are a new prospector or a pro, the gold pan is still the most indispensable companion you can have. It is one of the first tools used in locating gold and is one of the last used, even in commercial mining to check the value of ore being processed. The Gold Pan is used wherever gold occurs in approximately 75% of all the countries in the world. Until the last twenty years the most popular pan to evolve was the steel pan. These pans came with and without ridges and typically rusted easily. Probably the most efficient pan for the novice and expert today is one molded from tough, space age plastic. It is far superior to the steel pan for several reasons. Firstly, it is rust and corrosive proof. Secondly, it can be textured with a fine “tooth” surface to hold the gold better. Third, it is about one quarter the weight of a steel pan, and fourth the green color can be made a permanent black so that even the tiniest flakes of gold can easily be seen. The common sizes of pans today are the 8 to 12 inch pan, used primarily for sampling, or clean up. The 14 inch pan is the most popular, multi size use. The 16 to 18 inch pan is used by the more experienced panners. The larger pan load requires greater stamina and technique. An accomplished experienced gold panner can process about one cubic yard of material in an 8 hour day. But with the development of the hand sluice, the dredge, and the rocker, even the novice today can process about a cubic yard per hour.
How to Pan for Gold
1): Fill the gold pan about half full of gravel, then submerge it deep enough in water (stream or tub) so it is just under the surface of the water. Next give the pan several vigorous shakes back and forth and from side to side, but not too hard as to wash material out of the pan, you want to shake the gravel so the heavy gold sinks to the bottom of the pan and the less dense rocks and minerals float to the top of the pile in your pan.
2): Change from the shaking motion to a gentle circular movement, so the remaining material starts turning in a circle. This process will cause most of the dirt and clay to dissolve and wash out of the pan. If roots and moss surface, work them over your pan with your fingers to dissolve any lumps. Pick out the larger rocks, pebbles, and debris after making sure that they are washed clean of any mud or sand. You want to try and recover as much gold as possible but you will lose some in the process so don’t be to gentle in the operation. Do this until you have the larger rocks and pebbles washed out of the pan.
3): Now wash away the lighter sand and gravel. Hold the pan just under the water and tilt it slightly away from you. Begin to swirl the water from side to side, with a slight forward tossing motion. Take care, but with sufficient force to move the surface and the lighter gravel out over the edge of the pan. Leveling the pan out from time to time and shaking it back and forth will cause the light material to come to the surface and the gold to settle to the bottom. Keep working the pan until you are down to black sand and color(gold).
4): Now you will want to start carefully working the black sand. Now is the time to slow down and be careful. Leaving just a little water in the gold pan, lift the pan out of the water and use your tweezers to pick out any nuggets and large flakes and place these in your poke. You can use a magnet to separate the magnetite (black sand) from the gold. Continue panning the con down until it is about a third gold. As you pan you will notice that the gold will form in a tail behind the black sand. At this time you can clean up the gold with your tweezers and eye dropper. Keep panning until you are out of gold or out of black sand in the bottom of the pan.
Learning How to Pan for Gold
The easiest way to learn how to pan for gold, is to watch someone else do it first. You can’t appreciate how vigorously you have to shake the pan at the beginning until you see a master gold panner in operation. Many of the commercial gold panning tours in Alaska will teach you how to pan for gold, and will get you into the color in about an hour. If you want to learn prior to coming up to Alaska, you should consider joining a local gold prospecting club. You will get the chance to practice and also see what other people are using. If you don’t ave the time or desire to join a club the next best thing is to buy a video or book. I normally buy this type of specialized material from Amazon gold panning.
Gold Panning Kits
Many prospecting stores sell a gold panning kit. These kits normally consist of a gold pan, book and/or video, and a bag of sand with gold ore. The store will place a number of gold flakes and small nuggets in the bag of sand/gravel so that you will know the amount of gold you should be recovering. With these gold panning kits it is recommended that you pan the pay-dirt over a small tub or child’s play pool so you can recover the sand and gold you missed while you learn. It isn’t a bad way to go but not nearly as exciting as learning on a stream in the great outdoors.
Gold Prospecting
Alaska offers the visitor a wide variety of activities to do during their trip. Some are unique to Alaska and other activities are best experienced in Alaska. Whether it be shopping for native Alaskan crafts, riding in a dog sled, fishing for halibut, or panning for gold, Alaska will satisfy even the most selective travelers needs for unique and wonderful experiences. A common problem most visitors to Alaska face is not finding something to do during their vacation but rather selecting which of the many options they have available to them do partake in during their Alaska Vacation. We have selected the most popular activities for people coming to Alaska, but this list in far from being definitive. This site is constantly growing and we will add more things to do on your Alaska vacation as time allows. Where appropriate we list approximate prices and time required for the activity. Some of the activities and excursions listed here can be easily done with no prior planning or preparation. Others might require a reservation made months in advance, training, and specialized gear. What ever the case we will let you so that you can make the most of your Alaska Vacation.
Gold Prospecting
To many people gold prospecting is synonymous with Alaska and something they would like to “try their hand at” during a visit to Alaska. No matter if you want to a one hour lesson in gold panning, spend a day working gold bearing gravel, or strike out on your own — you’ll find what you need in Alaska to start your gold prospecting adventure. To get started you only need an inexpensive gold pan, some knowledge of where to go, and the desire to find gold in Alaska.
Where to Find Gold in Alaska
Bachelor Creek: Is 80 miles North of Fairbanks just past Montana Creek on the Steese Highway. There is a 4WD road that begins at the Dept of Transportation yard and goes around the fenced area. 4WD road not suitable for motor homes or most cars and you will go approximately 4 miles before reaching the mining area of the creek. No facilities available at the site. Area is open to gold panning, sluice boxes, rocker boxes, metal detectors and small suction dredges up to 6″.
Caribou Creek in the Matanuska River Area (State Property): Access road located at mile 104 on the Glenn Highway. Turn onto 800ft long road at the 4’x5′ billboard to parking area. Pans, sluices, detectors, and dredges. In 1991, the Alaska State legislature created the Caribou Creek Recreational Mining Area. Map and Information on Caribou Creek
Chugach (National Forest): Located Between Hope and Seward. Almost all active creeks, streams, and rivers are open to pans, sluices, & dredges (4″). The Alaska Mining Association has written a new guide for the area. Chugach Gold Mining Locations
Dalton Highway: Area on the “Haul Road” between Fairbanks/Prudhoe Bay. You can use: pan, pick, shovel, sluice box, rocker, metal detector. You can pan on any Federal stream segments along the Dalton highway south of Atigun Pass (mile 244) but no panning in the pipeline right-of-way (27 feet on either side of the pipeline) and no panning on Federal mining claims without the permission of the claimant. Dalton Highway Map
Eagle, AK (City and State Property): Along American Creek & S. of Eagle, Fortymile Creek along the Taylor highway, and the many tributaries feeding the drainage’s. This is the original Jack London country and home to one of the original gold strikes in Alaska.
Hatcher Pass Recreational Mining Area Located approximately 15 miles northeast of Wasilla off of Palmer-Fishook Road, with recreational mining allowed along the Little Susitna River and tributaries and also with the Independence Mine State Park. Gold panning, shovels, picks, and small suction dredges. Check with State Ranger on permitting requirements for small dredges. Additional Information on Hatchers Pass Recreational Mining Area
Nome Beach Gold panning along the beach in Nome, Alaska. Panning is permitted on the beach east of Nome between town and the Fort Davis Roadhouse (2 miles). There is gold in the sands and it’s yours to keep. Tour companies will also take you to various panning locales along the beach.
Nome Creek, White Mountain National Recreational Area: Is the largest area of this kind in Alaska. Gold pans, metal detectors, sluice boxes and rocker boxes only. It has a rich history of gold production and is easily accessible even with the super size motor homes that tourists bring to Alaska. A huge road project completed in 1997 made access to this area from the Steese Highway very easy. Road begins at 57.3 mile Steese Highway. The road is approximately 5 miles long from the Steese Highway to Nome Creek mining area. Restrooms (outhouses) available and camping areas too. The Steese Highway is paved only to mile 44.
Pedro Dome: Is the oldest such area in the Fairbanks area. The area is the general location where Gold was first discovered in the Fairbanks area by Felix Pedro on July 22, 1902. This is the strike that put Fairbanks on the map. Small area, approximately 1 acre in size open to gold pans, metal detectors, sluice boxes and rocker boxes. There are no facilities such as restrooms, drinking water or food vendors in the area.
Peters Creek: State of Alaska managed recreational mining area, located at approximately mile 30 of the Petersville Road. Recreational gold panning, mineral prospecting, or mining using light portable field equipment are allowed without any permit. Also, you can obtain a permit from the DNR to use a small suction dredge. Primitive camping is available in the area. Map and information on Peters Creek Recreational Mining Area
Wrangell-St. Elias National Park & Preserve Mineral collection and gold panning are allowed within Wrangell-St. Elias National Park and Preserve. The use of metal detectors is illegal. Numerous historic mining locations on public land can be panned for gold and other minerals. In general the Dan Creek area, Nabsena, and McCarthy vicinity are the best areas to prospect.
And There are numerous other spots to pan for gold during a trip to Alaska. You might find a new spot or discover an old one just by panning for color when you stop along the highway. In addition to these public access areas for gold mining in Alaska, the state also offers a seemingly unlimited selection of commercial gold panning, sluicing, and mining operations, where a tourist can learn how to pan for gold. Many local visitor offices will be able to give specific advice on their local area. Some spots are better than other. We will continue to add to this list of “Where to pan for gold in alaska”. Good Luck.
Gold Prospecting in Alaska
Gold prospecting in Alaska is great when you find gold
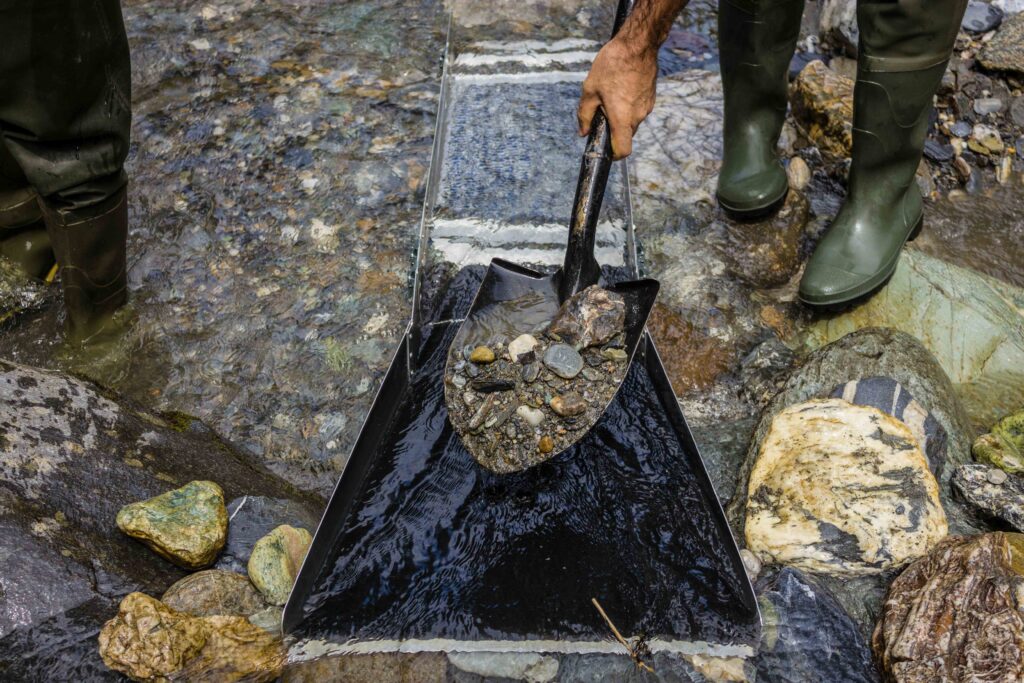
Alaska has been home to many of the gold rushes of the 19th and 20th centuries. People came from all over the world to take a chance at making their fortune in the goldfields of Alaska and still do so today. Some are professional exploration geologists and gold prospectors while others are greenhorns learning the ropes of Alaska gold prospecting. No matter what level of experience you bring to the state you can have a wonderful time exploring for gold. You might be content to spend an afternoon panning for gold along the beaches of Nome, Alaska, or maybe you want to run a gold dredge along the forty mile creek, you might even want to get your supplies and head into the wilds of Alaska to search for the newest gold strike. If you have already been bitten by the gold bug you can utilize these pages to help plan your alaska prospecting trip, so you can spend the most days working in color. Those new to gold prospecting can utilize the information here to get started on their new gold adventure in Alaska. The emphasis of information offered to alaska gold prospectors and adventurers on these pages in predominantly for placer gold and paleoplacer gold prospecting and mining. Hard rock mining and underground exploration for gold in Alaska are beyond the scope of the information and purpose of this site. If you would like to learn more about lode gold in Alaska please refer to the links at the bottom of the page. While gold is a very valuable metal and many fortunes have been made from gold, you not plan on making money or even breaking even on any of your Alaskan Gold adventures. You easily could find the gold nugget of a lifetime but more than likely you will find some gold, have some fun, and earn a greater respect for the prospectors that came before you.
Getting Started
The first consideration when planning a gold prospecting trip to Alaska is your budget. How much time and money are you willing to devote to the venture. If you can only fit an afternoon of gold panning on your trip might want to consider one of the commercial gold panning operations operated throughout the state of Alaska. If you have a week and only want to gold prospect in Alaska during your trip a club or professional prospecting and mining adventure might be the right choice. If you have all summer and really want to have a go of exploring for gold in Alaska then perhaps getting a serious outfit is in order. You will have fun regardless of your time and financial budget. The key is to make the most the resources available to you while you are in Alaska prospecting for gold.
Once you have an idea of you budget next you will want to consider the type of trip you want to take. Do you want to do-it-yourself, go with a gold prospecting club, or a commercial operation? What kind of accommodations do you need? Is roughing it to you, no room service or are you happy in a primitive setting, cooking your own food and sleeping in a tent? What ever your preference you will be able to find the type of trip or adventure you want with just a little planning.
Finally you will want to prepare well in advance for your Alaska gold prospecting trip. If you are planning on doing your own trip and you are new to gold prospecting, you will have the most preparation prior to coming to Alaska. You will have supplies to purchase, equipment to master, and research to do prior to departing to Alaska. The easiest way to get up to speed on gold prospecting is to join a club in your local area prior to your Alaska trip. If you have decided to come on a club trip they will be able to tell you what to expect and what your duties will be in camp. You will also want to research the area prior to arriving at the mining camps. Commercial trips take the least amount of preparation but are the easiest. The outfitter will tell you what you will need, normally just your warm weather clothes and rain gear, all other supplies will be provided. Typically your food will be prepared and you will have a warm dry place to sleep, if you requested a multi day gold prospecting trip.
While planning will always make your prospecting trip to Alaska more enjoyable you can always make arrangements for a gold panning adventure once you arrive to Alaska. You might not find the exact trip you want but with a wide selection of gold prospecting and tour companies you will find something to your liking. Time Saving Tips for Gold Prospecting in Alaska
Type of Operation
Gold Panning: The gold pan is the quintessential tool of the Alaska Gold Prospector. When you see one you know that the person is either a gold prospector or planning on becoming one in the near future. They range in size and composition but the shape and style have stayed the same for the last century and no major design changes are foreseen. The gold pan is actually an exploration tool used by gold prospectors to locate an area with the potential for gold or containing visible gold that can be dredged or sluiced. They are inexpensive, small, and easily transported. They also don’t break easily. Normally this is the entry point for those wanting to try out gold prospecting. In Alaska gold pans are used by people exploring creeks, beaches, and panning out the fines after a day of sluicing. Learn more about gold panning in Alaska
Gold Sluicing: Once gold bearing gravel has been located it is time to move to a more efficient method of extracting the gold ore. The preferred method for small prospecting operations is the hand gold sluice. A sluice box consists of a simple trough lined with raised obstructions placed at a ninety-degree angle to the flow of the stream, these are known as riffles. Most modern sluice boxes are made of sheet aluminum or one of the new composite plastic materials. The heavy material such as gold, iron sand, silver, lead and sometimes even platinum, sink quickly and are caught by the riffles. At the end of the day the sluice box is taken apart and the concentrates are panned down to the gold or other metals. Learn more about the gold sluice box
Gold Dredging: In Alaska, dredging is a common method to productively work deeper zones of creeks and streams. A gold miner will use a wet suit and using a suction hose from the dredge, literally vacuum the stream bed. Attention is given to cracks and depressions, behind large racks, and slow moving zones of the stream — where gold is trapped during highwater. To learn more read Gold Dredging in Alaska
Gold Metal Detectors: One of the most productive tools a recreational gold prospector can possess for hunting gold nuggets in Alaska. They are simple to operate, easy to carry, and can be used in many other adventures, not just your gold prospecting trip to Alaska. These detectors use electromagnetic induction to detect metal and are able to distinguish the type and depth of the target. Unwanted metal types (rusty nails) and be filtered out so you won’t be digging for treasure you don’t need. To learn much more about metal detectors and how the work read Gold Metal Detectors in Alaska
Where to Go
Public Mining Areas in Alaska – A list of recreational mining areas throughout the state of Alaska. With the exception of the beach at Nome, all areas are along or accessible from the road system. These are well known areas and will allow the visitor to find some gold during their trip to Alaska.
Commercial Properties – Many owners of mining properties in Alaska have opened up there mining operations to the public. They charge a small fee for access and the visitor gets to keep the gold they find. Some of these properties have gold to find in the existing stream gravels, banks, and pre-worked zones. While others will provide gold bearing sand and gravel. This is where they will salt gold in the gravel so that it is evenly distributed so that everyone will be able to find some gold to take home. Most of the mainstream two hour gold panning tours operate this way. If you are in a hurry these commercial operations offer a nice taste of Alaska gold mining.
Prospecting Club Claims- Mining clubs have purchased productive gold mining claims, specifically the GPAA, and allow their members access to the mining area. They are located throughout Alaska and give the dedicated Alaska prospector a chance to mine in productive historic area. We have listed a few mining properties owned by clubs here in Alaska, but you should check with your local club prior to coming to Alaska, to see if they have any new gold properties in Alaska.
Prospecting Supplies
If you are planning to drive to Alaska I would strongly recommend purchasing your prospecting supplies prior to your departure. You will find many streams that will entice you to stop and pan for awhile as you drive through Alberta, British Columbia, and the Yukon — especially if you travel through Dawson City. The supplies you need can also be purchased in Anchorage or Fairbanks. If your town doesn’t have a gold prospecting store your might want to consider these national companies that specialize in gold prospecting supplies.
Staking Claims
In Alaska there are four types of property that mining takes place on — private land, native corporation trust lands, state land, and federal land. Most small scale miners will not be able to secure a lease with a native corporation. This leaves the public lands of the state and federal governments that a prospector can explore upon in Alaska. Staking a claim is not a trivial undertaking, but then neither is exploring for gold. Learn more about staking mining claims in Alaska
Selling Your Gold
Finding a place to sell the gold you recovered in Alaska is not nearly as difficult as bringing it to market. Gold can be sold as either a commodity — to a refiner — or as natural art — being sold to individuals, jewelers, artists, and to other prospectors that haven’t had the kind of luck they would find when prospecting for gold in Alaska. The process of selling gold is a little complicated, but easily learned. In the most simple form it can be described as selling the nuggets to jewelers or individual for about twice the spot price of gold (this varies by nugget, but in the up direction) and selling the fine gold to a refiner. Learn about selling gold from Alaska
Clubs and Organizations
Alaska Department of Natural Resource – State of Alaska resource for mining on public lands. The DNR also has geologic reports on mining districts in Alaska.
GPAA – National gold prospecting club that offers group outings, local chapters, and mining vacations. They also have their own TV show.
USGS – United States Geological Survey. Best source for mining reports, maps, and information on where to explore for gold in Alaska and the rest of the USA..